
Are you curious about what really goes on during an insulation inspection? Whether you’re looking to enhance your home’s energy efficiency or ensure your insulation is up to par, this guide walks you through every step of the process. Let’s dive into the key stages that make up a comprehensive insulation inspection and what you can expect along the way!
What Happens During an Insulation Inspection?
If you’ve never had an insulation inspection before, it’s completely normal to feel unsure about what will happen.
Many homeowners hesitate to schedule one because they’re worried it will be:
- Sales-heavy
- Complicated
- Disruptive to their home
In reality, a good insulation inspection is simple, informative, and low pressure. Its purpose is to understand how your home is performing and where improvements can be made.
Here’s exactly what to expect.
Step 1: Quick Conversation About Your Project
The inspection usually starts with a short conversation.
You might be asked:
- Are certain rooms colder or hotter than others?
- Do you feel drafts anywhere?
- Have your energy bills increased?
- Have you had any past insulation work done?
You may also be asked about your home’s age or any known issues.
This helps provide context so the inspection is focused on what actually matters in your home.
Step 2: Exterior & Overall Project Assessment
Before diving inside, many inspections include a quick look at the exterior.
This may include:
- Roof condition
- Siding condition
- Visible gaps or penetrations
These areas can reveal clues about potential insulation or air leakage issues.
For example, exterior wear or damage can sometimes point to deeper problems inside the home.
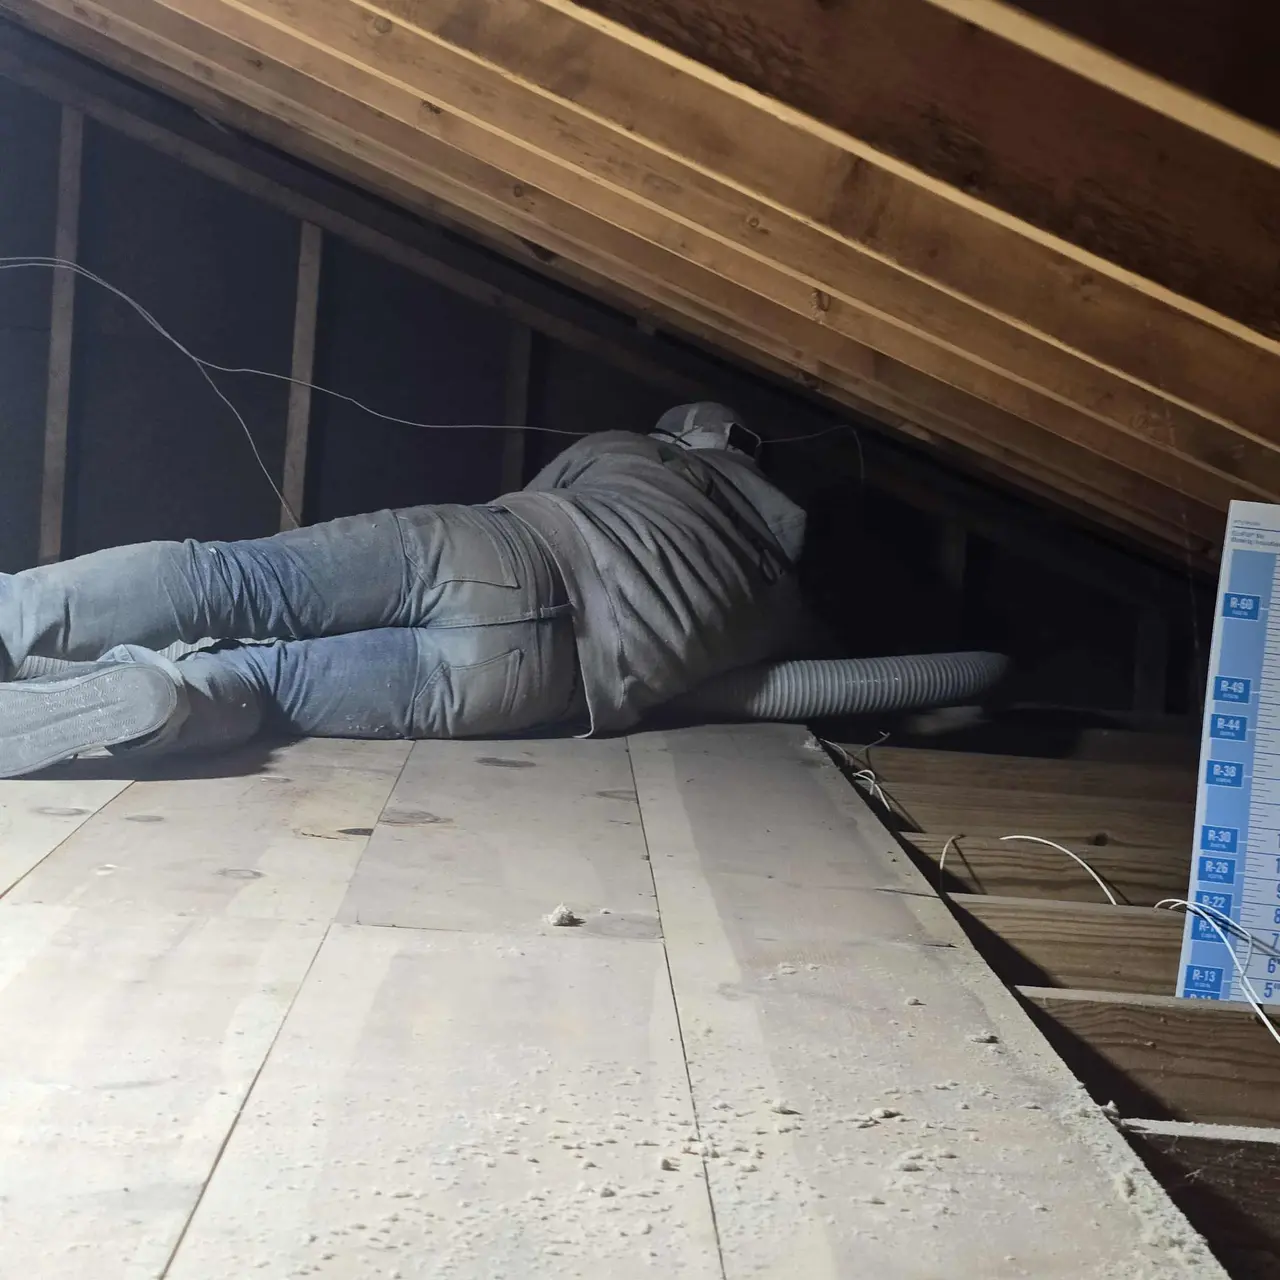
Step 3: Visual Inspection of Key Areas
Next comes a walkthrough of the most important areas where insulation and air leaks typically occur.
These usually include:
- Attic
- Basement or crawlspace
- Garage (if attached)
- Exterior walls (when accessible)
The goal is to identify:
- Missing or thin insulation
- Gaps or air leaks
- Signs of moisture or damage
- Ventilation issues
This is not invasive—no walls are opened unless discussed ahead of time.
Step 4: Identifying Insulation Type & Condition
During the inspection, the contractor will identify what type of insulation is in your home.
This could include:
- Fiberglass
- Cellulose
- Spray foam
But it’s not just about the type—they’ll also evaluate how it’s performing.
They’ll look for:
- Compression or settling
- Gaps or uneven coverage
- Areas where insulation was poorly installed
Some homes even have multiple types of insulation, especially if updates were done over time.
Step 5: Checking for Air Leaks
Air leakage is one of the biggest causes of comfort problems.
During the inspection, common leak points are checked, such as:
- Attic penetrations (wires, pipes, recessed lights)
- Rim joists
- Top plates of walls
- Gaps around framing
In some cases, tools like a blower door test may be used to measure how much air is escaping.
Even small leaks can have a big impact on comfort and energy bills.
Step 6: Measuring Insulation Levels and R-Value
In areas like the attic, insulation depth is measured to estimate performance.
This helps determine:
- Whether insulation meets recommended levels
- If areas are under-insulated
- Where heat loss is likely occurring
Some inspections may also use thermal imaging cameras to identify cold spots and areas where insulation is lacking.
This makes it easier to see problems that aren’t visible to the naked eye.
Step 7: Looking for Moisture or Ventilation Issues
Moisture problems are often connected to insulation performance.
The inspection may include checking for:
- Damp insulation
- Signs of condensation
- Mold or musty odors
- Poor attic or crawlspace ventilation
The inspector will also look for potential sources of moisture, such as:
- Roof leaks
- Plumbing issues
- High humidity
Addressing moisture is critical before adding or replacing insulation.
Step 8: Explaining Findings in Plain Language
Once everything is reviewed, you’ll get a clear explanation of what was found.
This typically includes:
- What’s working well
- What could be improved
- What issues are causing discomfort
A good contractor will explain things in a way that makes sense, without technical jargon or pressure.
Step 9: Recommendations (Not Pressure)
If improvements are needed, you’ll receive recommendations based on your home.
These might include:
- Air sealing
- Adding insulation
- Removing damaged insulation
- Improving ventilation
You’ll also understand:
- Why the recommendation matters
- What impact it will have on comfort and efficiency
There should never be pressure to move forward.
Step 10: Optional Free Quote
If you’re interested, a detailed quote can be provided.
This typically outlines:
- Scope of work
- Materials being used
- Areas being addressed
- Pricing
A quality quote should be clear and easy to understand—not confusing or vague.
What an Insulation Inspection Is NOT
To reduce any hesitation, it’s important to clarify what an inspection is not:
- It is not a high-pressure sales appointment
- It does not require commitment
- It does not involve tearing apart your home
- It does not take all day
The goal is simply to give you answers about your home.
Why Homeowners Get Insulation Inspections
Most people schedule an inspection because of:
- Cold floors or rooms
- Drafts during winter
- Uneven temperatures
- High energy bills
- Musty smells or moisture concerns
If you’re noticing any of these, an inspection helps connect the symptoms to the cause.
Get Clear Answers About Your Home
If you’ve been unsure about reaching out, that’s completely normal.
An insulation inspection is one of the easiest ways to understand:
- Where your home is losing energy
- Why certain areas feel uncomfortable
- What improvements would actually make a difference
Schedule a free assessment
We’ll walk through your home, explain what we see, and answer your questions.
No pressure. Just clear, honest insight into how your home is performing.
FAQs
How long does an insulation inspection take?
Most inspections take between 30 minutes to an hour, depending on the home.
Do I need to prepare my home?
No major preparation is needed. Just ensure access to attic or basement areas if possible.
Will anything be damaged during the inspection?
No. Inspections are visual and non-invasive.
Do I have to commit to work after the inspection?
No. The inspection is purely informational.
What tools are used during an inspection?
Some inspections may include tools like thermal cameras or blower door tests, but not all homes require them.